Learn How to Make This Digital Product Mockup Design In Canva

Welcome to my latest series, Learn Design with Diana, where I’ll be walking you through step-by-step how to design this simple mockup design using Canva! This is great for any content creators or female entrepreneurs who are selling digital products, ebooks, workbooks, etc.
As a reminder, this is what we will be creating today!

Before we get started, make sure you have something you’d like to promote so that you can start creating your own!
Let’s get started!
Go to Canva.com and click, “Create a New Design”
Click on “Custom Size” and Enter in, “1080 x 1350” (which is an Instagram Post size, actually). You can use any size you’d like, for example if you were creating a Pinterest Post, but for the sake of this tutorial we will be using this size.

3. I always like to start off with having my logo added into the design, so just simply drop your logo into the empty design.
4. Then, add in your heading copy and here’s a quick trick on capitalizing all your letters, just click the aA next to the underlined U!

5. Now we need to add the rectangle behind the heading copy.
Here’s an advanced tip you might not know about! Most people go through the elements feature of Canva to find a rectangle, but you can actually create something using the effects tool!
So, click on “Effects” and click, “Background”

6. Play around with the settings and make sure to add in your own brand colors! I changed the background from the default color and made it to The Coffee Date’s dark green and also increased the spread so that the rectangle was larger.

7. Add in your CTA or any other copy you’d like, then let’s search for an arrow using the elements feature!

8. Now, let’s work on our mockup. You can read an in-depth guide on how to create a Canva Mockup in this blog post! Once you’re done creating the mockup, we need to finish embellishing the rest of our design!
Your design should look a little something like this…

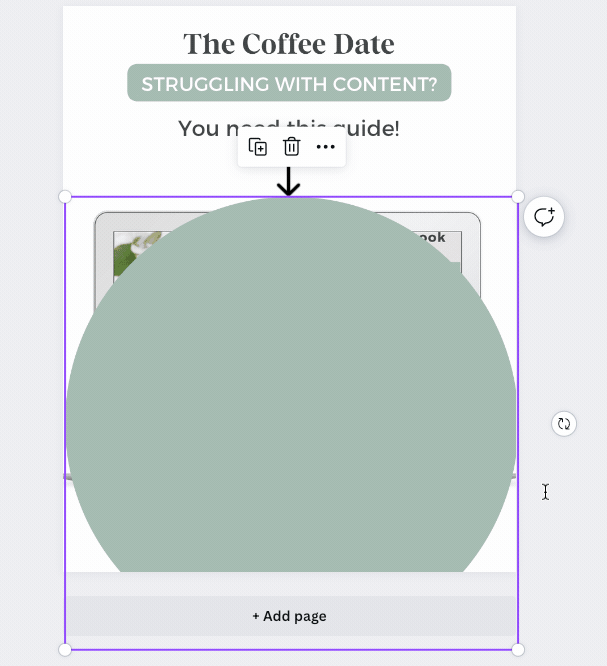
9. Now it’s time to add the circle in the background. Go to elements and search for a circle, then we are going to right click, “Send to Back”. Play around with it until its the size that you want.
10. Write the copy you want to appear in the circle, in this case mine was “FREE DOWNLOAD” and place it at the bottom of the design. Then start copying the text so that there ends up being four rows.
Your design should look like this now!

11. Now select all of the copy and change the opacity from 100 to 22 (or however much you’d like!)

12. Now, move the first three, “FREE DOWNLOAD” to the back (right click and select, send to back)!
13. It’s time to make the button! Search for a rectangle in the elements and add one in, making sure to use your brand colors.
14. Search for “LINE” to add under the rectangle to create a cool shadow.
15. Type in a CTA in the rectangle!
16. Finally, we are going to look for some stars to add in the background, just type in “STAR” in the elements search bar. Add those stars behind the laptop and right-click, “move backwards”. AND YOU’RE DONE!!!
Presenting the finished product….
Let me know what you think about this tutorial and if you’d like me to make some more in the future!
And, if you’re looking to elevate your designs…look into getting CANVA PRO. The free version of Canva is pretty great, but the PRO version offers so much more like amazing stock photos, eye-catching effects, and more!
Check out Canva Pro here!
This post contains affiliate links. This means I may earn a commission should you chose to sign up for a program or make a purchase using my link. Even so, this does not affect my recommendations for these products or programs. For more information, please view my privacy policy.