How to take Gorgeous Instagram Photos?

As a creative entrepreneur(bloggers, I consider you ladies entrepreneurs too!), it may be hard to think of what photos to take. Unlike lifestyle bloggers who can snapshots of their everyday life, you have to find a blend between taking photos that make sense with your business but at the same time still look beautiful and interesting. But, how exactly do you take nice photos that interest your readers and make them want to “click”?
Why it’s so important to have high-quality photos (on Instagram and off Instagram):
First, let’s back it up to why taking high-quality photos are so important for your blog. Ask yourself this – have you ever gone to a blog and seen that its photos were dark and blurry? What would be your first impression? “They’re probably a new blogger,” you may say, or worse, “That’s so unprofessional.”
High-quality photos make a huge difference. If you reach out to a potential brand and want to review their products, what’s the first thing they’re going to do? Look at your website design, see how much engagement you have on your posts, then look at your photos. Why would a brand work with you if you have dark, blurry, and unprofessional photos on your blog?
The whole point of working with you is to have you advertise their product in an attractive and appealing way to your readers.
What about if you’re a creative entrepreneur who delivers a service to other women? In order for people to trust you and your business, they want to see high-quality graphics or posts on your website because let’s face it – if you can’t find the time to put effort into finding photos that convey what you’re talking about then it makes you look unprofessional.
Also, think about how these images will affect the way that others share your content as well. If you’re a food blogger who takes blurry photos in dim lighting then people may not be sharing your content on Pinterest. If you’re a beauty blogger who wants to get featured on a big account and your strategy is uploading snapshots of their products in hopes of getting featured on a major account then you better make sure your flat lays are flawless! (Don’t have to be flat lays, I just always wanted to say that!).
Hopefully, by now, you know how important photos are. But if you are still struggling with how to take photos that make an impression, then hopefully the tips below will help you!
To get started here is a BEFORE and AFTER of photos I was taking for my lifestyle blog.

This just shows you how important it is to have high-quality images on your blog or website. (The photo on the RIGHT was taken with a camera though, not a phone*)
How to take great photos (these work on and off Instagram!)
1. Take photos using natural light.
For my Instagram and for my blog posts, I take photos on weekends when I don’t have work and wait until the
lighting is just right. I never take photos at night because even though I know how to use Photoshop – it’s very hard to turn a dimly lit photo taken at 10 PM with horrible lighting into something that looks bright and gorgeous.
2. Start styling your photos.
Do you ever see that gorgeous flat lays that popup on Instagram? I used to be amazed by how beautiful the photos were and how lucky the photographer was that they just
happened to have the perfect items lying around to complement the featured product… that’s when I realized this secret. Almost all the wonderful/breathtaking flat lays or blog photos you see are styled.
What exactly does a styled photo mean?
This means that the photographer carefully plans out what their featured item will be, and then places products that complement the product and “make sense” around it. Every item is picked carefully to ensure that the photo looks appealing.
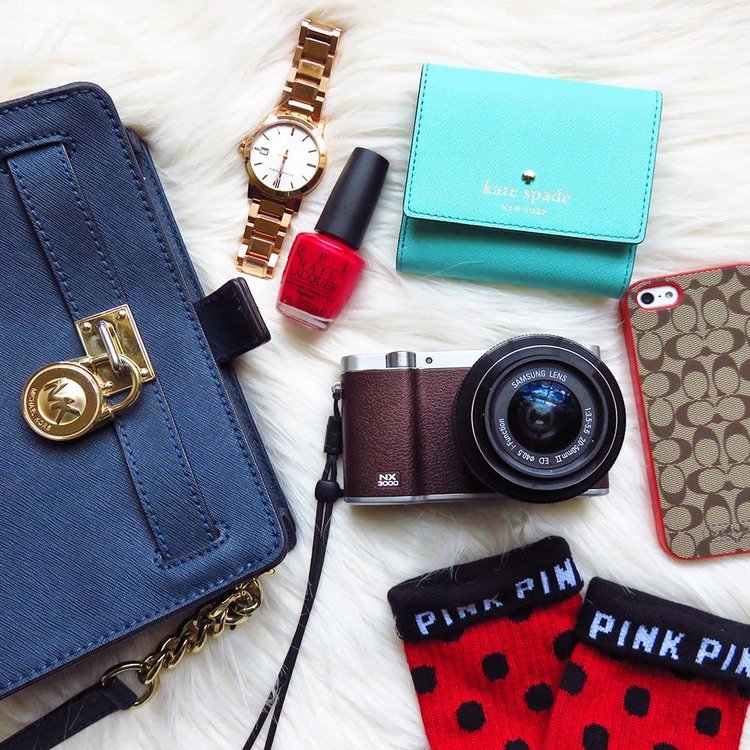
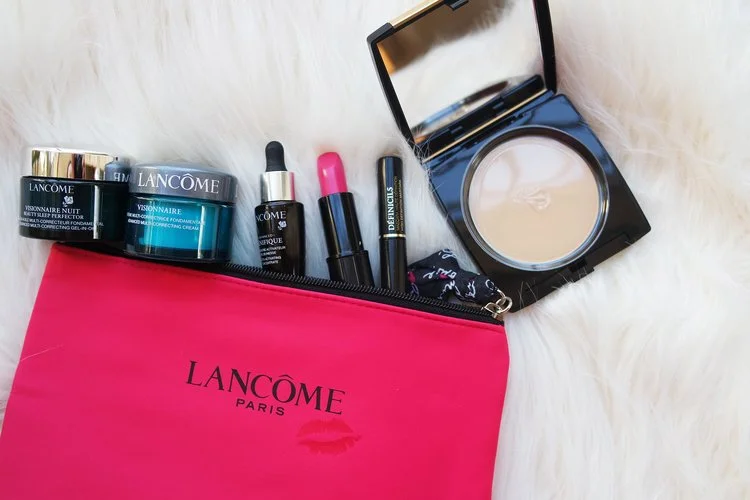
Here’s a photo that I styled. Check out the rest of my IG here.
How to make styling easy:
1. Have a box of props that you’ll use on a daily basis. These could be simple things like scrapbook paper (to use as the background), white foam boards, cute plates and cups, business cards, and notebooks.
Here are two of my favorite props/backgrounds I use to make sure my photos stand out:

I love how they both give off very different feels, take a look:

I also work with entrepreneurs to take photos of their products, so having multiple backgrounds help me convey their brand as well. If you're interested in having photos of your product, just click here.
Some simple tips:
1. If you’re blogging about a skincare product that features a
certain fruit or ingredient, use that to your advantage and place the fruit/ingredient around the object. Here’s an example of me using an essential oil:
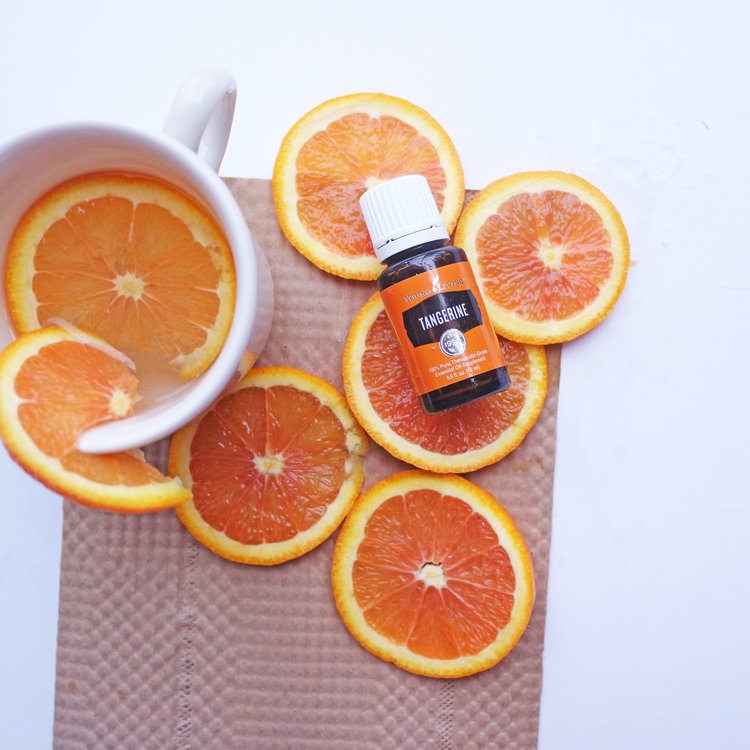
Okay, it says tangerine and for a whole hour, I got a tangerine and an orange mixed up but shh...
2. If you are talking about a recipe you made or a
dessert, you can use sprinkles or chocolate chips to make the photo more appealing. I like to place the ingredients used to create a dish carefully around the photo. Here’s
an example:

This picture may not be as nice as the rest, but it was taken early on when I first started blogging (with a little point-and-shoot!)
Like this post? Click HERE to automatically tweet, "Learn how to take gorgeous photos for Instagram, even without a DSLR"
3. Try 3 different angles
I went to an Instagram Workshop and the person leading the workshop could not stop talking about how it’s super important to take photos from 3 different angles. Why? Because you want to have plenty of options to choose from. What may look good from one angle, could look GREAT at a different angle. So, whenever I take photos I try 3 different angles (but from my Instagram, you can probably tell that the overhead shot is the best one!).
Here’s an example of a photo taken 2 different ways: which one do you think looks the best?


Favorite Tip ever – Have a Batch Shoot Day!
I’ll let you in on a secret, I spend my Sundays with my camera slung over one side of my shoulder and with various products lying about. I can’t imagine spending 30 minutes a day setting up my props, taking six photos and then going to the computer to edit them. The easiest way to take photos for your Instagram and to ensure that you save the most time is to save one day out of the week to take photos in a batch (hence, batch shoot day) and then when I’m done taking photos I’ll go and edit all the photos at once. Plus, think of all the time you’ll save since you’re not setting up props on multiple days.
Want to keep on learning? Here are some more RESOURCES:
1. 6 Styling Tips to Improve your Instagram Photography
